free woodworking plans
“+10,000 Step By Step Plans …even if you don’t have a large workshop or expensive tools!“ Click Here 👈
Transcript
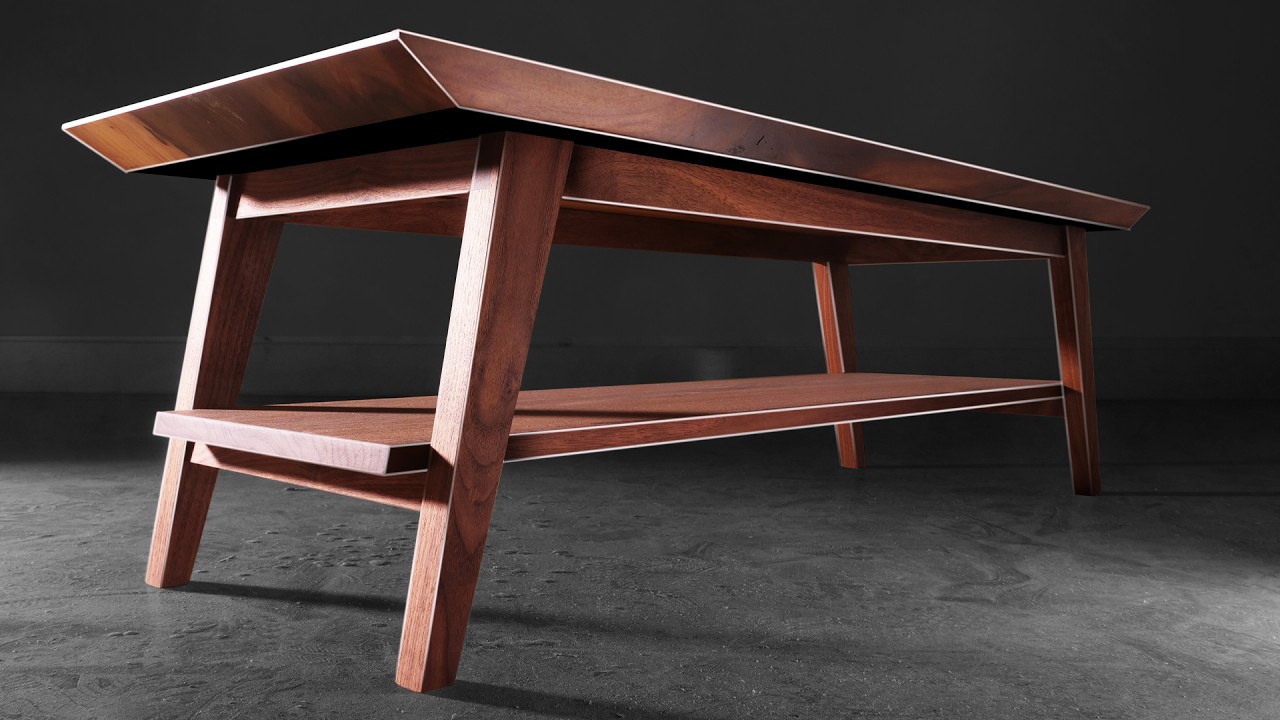
so this piece was supposed to be a desk here’s what happened a few weeks back a client reached out we kicked around a couple ideas and eventually landed on a design and found this really beautiful southern magnolia slab that was perfect so I got the slab and well long story short he backed out and now it won’t be a desk it’ll be a coffee table so obviously this isn’t a great way to kick off a project but I had an idea I want to turn this bad situation into a win and try to do something that’s better than the original idea in every way possible and I don’t want to jinx myself but I think I did it and by the end of this video I think you’ll agree so this lab is about two and a half inches thick and as you just saw even plunging to full depth it was too much for my tracksaw to handle which meant I got the bust out a handsaw to work my way through the rest of the cut I guess maybe it’s time for some new tools actually speaking of that I did get one new tool and it’s a big one an avid 5 by 10 CNC and it was more expensive than a truck saw actually though compared to other cncs it is pretty affordable but no matter how you spin it twenty one thousand dollars is a lot for anything except maybe like a Ferrari anyway now I’m sure I’m going to use this for all sorts of stuff but the main reason that I wanted to upgrade was for slab flattening basically I’m tired of having to take them somewhere every time that I want to flatten them and also it’s not like doing that as a free alternative costs about 120 every time I flatten something so I figured it this way I flattened about one slab a month so I’m saving about 120 a month which means at this rate I’ll break even in September of 2037. and actually that doesn’t include my time takes about three hours round trip for me to flatten a slab so if I just charge myself six thousand nine hundred and sixty dollars an hour I can actually break even with just this slab so as a guy who works pretty much exclusively with wood all day every day it might surprise you to learn that I know almost nothing about the actual wood itself but I do know the next best thing which is I know people who know about wood like this guy southern magnolia I should have looked up the botanical name darn it before we got it you flash it on screen okay maybe he doesn’t know that much nah he does typically the Magnolia is like really buttery and not a lot of action in The Grain department they typically think of like a healthy Magnolia being like this okay so one this happens it’s called spalting and that’s a fungus attacking the wood and changing the color of the wood so the wood is at some stage of Decay so what happened like you can see right here there’s a little pruning wound from 40 years ago a fungus landed on the wood started to Decay the wood then the tree grew over it this is still super sound wood right it’s just got the look people shouldn’t be expecting that if they go get any Magnolia that this is what it’s going to look like you might around the pruning one just have a little black spot okay I feel like that’s the selling point of this I agree that’s the cool thing about you know the urban Forest because the pruning wounds and the red Community it got a little bit more Wild okay I should explain a couple things first all I’m doing here is removing all the loose bits in the slab so that when I go to pour epoxy in a minute I’ll get a nice Bond and second if you’re like me you might never have heard the term Urban Forest before so basically it just means trees that are in cities and suburbs and John works for a company called Street tree Revival and to oversimplify it what they do is whenever a tree needs to be removed and that could be because a storm knocked it down or it’s diseased or any reason they try to salvage and repurpose them so that they don’t just end up in a landfill I mean depending on how this project turns out it might still end up in a landfill but at least they’ll have done what they could to delay it and that’ll be my fault now for as little as I know about wood when it comes to epoxy I know even less because here in addition to not really understanding the product I’m almost equally dumb when it comes to using it but I did figure out one hack that has been working well so as you just saw I did a pretty mediocre job there building my form and normally this would cause me a lot of anxiety when I’m pouring because I’d have to spend the next 72 hours wondering if everything was just gonna spill out all over the ground so what I’ve been doing lately is doing an initial pour which will end up on the bottom of the slab using high performance slow hardener which despite the name hardens relatively quickly so instead of wondering for 72 hours I only need to wonder for about three hours then a day or two later I can top everything off with the Deep pore now I should mention that this hack won’t work as well if you have big open areas of epoxy on an edge of your piece like here for example and that’s because you’ll see a line where the two pores meet all right so obviously we’ve jumped ahead in time here a few days and as you can see I’m busting my slab out of the form and then throwing it back on the CNC for a light pass to clean up the surface and this took about 30 minutes so if you’re keeping track that means now instead of having spent twenty one thousand dollars I’m actually up 3480. I’ll be the first to admit that I talk quite a bit in these videos which is weird because in real life I really don’t speak unless spoken to and anyway a lot and I mean a lot of people have told me to shut up some are nice summer mean and some keep it simple now I don’t think that their advice is good advice but it’s not terrible either so I took it and I started a new channel called sound of saws where I’m re-cutting versions of my builds only without talking much more straightforward and relaxing honestly it’s kind of weird watching them without talking for me I feel like it somehow makes me look like I know what I’m doing more than I actually do and unless you’re a Super Fan which I don’t think I have any of there’s a good chance that some of the projects are going to be new to you so give them a look and leave me a comment over there and let me know what you thought I’ll link a playlist at the end of this video to remind you and to all those people who’ve told me to shut up thank you for the idea and to all of you who like the talking or at least tolerate it thank you too I appreciate all of you and if you want to return the favor you can hit the Subscribe button to show me okay this next part’s gonna look a little sketchy but it’s actually something that’s pretty simple and safe to do so I want to cut a 75 degree chamfer onto the ends of my panel but the problem with this is that on most table saws mine included the blade can only tilt to 45 degrees so because of that the solution here is to change the orientation of your work piece so that you’re cutting vertically instead and with the piece like this now if you were to leave the blade at 45 degrees you’d still end up with a 45 degree chamfer but the closer you put your blade back to being vertical the steeper of an angle you’re cutting onto your work piece so to make this cut safely I made myself this little carriage sled jig thing basically it rides on my fence and I can clamp my panel to it and everything’s secure and my hands aren’t anywhere close to the blade while I cut now they actually do sell chamfer bits that are made for cutting steeper angles but they’re pretty expensive usually well over a hundred dollars and obviously they only do one angle and they usually can’t cut as long of a chamfer so there you go I just saved you a hundred bucks and now I’m gonna save you a hundred more seriously so that tip about cutting steep chamfers maybe you’ll use it maybe you won’t but regardless I hope you’ll agree it was easy to understand now if you’ve watched a decent amount of my videos something you’ve probably realized is that I don’t really take myself very seriously and honestly I spend a lot of time kind of poking fun at myself in these videos and essentially downplaying my skills as a woodworker and truthfully as a woodworker I would say that I’m serviceable definitely by no means great maybe good at best but there are two areas of woodworking where I think I’m actually better than good the first is design I think I’m a better than average designer and the second and where I think I’m by far the strongest is as a teacher I think I’m pretty good when it comes to taking a technique and making it really easy to understand and I think I’m also pretty good at walking people through building a project now you probably think that I’m about to go into a sales pitch for our plans but that’s not what this is so at the beginning of the video I talked about how this project got off to a bad start and how I wanted to try to turn things around and make it a win so here’s how I’m going to do that and this is where I’m going to need your help like I said this project is now going to be a coffee table and as we speak I’m hard at work making a set of plans for it that’s 100 free and we’re not talking about some crappy five-page PDF and a cut list it’s gonna be exactly like the plans that we sell for 90 only completely free chapter has videos dimensional drawings full online course experience no strings attached well I guess kind of one string and that is it’s not done yet these things take about two to three hundred hours to put together and we’re deep into it but yeah it could be done in a couple days or it could be a couple more weeks I really don’t know but if you want it when it’s ready in the description I’m going to put a link that says this so go find that and you can sign up to get notified as soon as it’s finished and then it’s yours for free now you don’t have to go do it right now I’ll remind you again at the end of the video or if you want you can go do it now and then just come back to see what you’re actually going to be building okay so there’s probably three questions that you’re asking yourself right now and the first two are do I need a slab to build this and do I need a festal domino to build this and the answers are no and no actually what I’m doing in this shot is putting together a panel for a shelf and we’ll cover doing this as well as another panel for the top in detail so no you don’t need a fancy slab of Magnolia grandiflora as my botanical name heads out there like to call it and as for the Domino again no we’ll go over a bunch of Alternatives so don’t stress about it and then the third and biggest question you’re probably asking yourself is what exactly are we building so you already know coffee table but I didn’t exactly go into detail so let’s fix that now so designing this piece I tried to keep things simpler than I normally do and you would think that keeping it simpler is easier but it’s actually kind of harder and there were three factors that I tried to keep in mind while I was coming up with ideas it has to be something that would look good in pretty much any living room it needs to be a learning tool for a variety of techniques and it needs to lean more towards function than wow factor and this is what I came up with so I don’t think anybody’s gonna walk into a room see this table and dislocate their jaw but I think that it did turn out to be a really beautiful kind of quintessential mid-century modern piece and hopefully something that you’ll be excited to build here’s a question what does mid-century modern furniture look like to you what are the major Design Elements don’t answer that I asked chat GPT in an effort to basically try to get it to say angled splayed legs like I’m building here but he came back with this huge answer that I didn’t really want to read so then I asked it to sum that up in 100 Words and make it simple enough that a 10 year old could understand it which is about how smart I’d say that I am and the answer that it gave was still more of a history lesson than a conversation or an opinion like how you probably would have answered if I hadn’t said don’t answer that so then I asked it to get more specific about wood and still no dice so then I just straight up asked it if it was familiar with four eyes furniture and it said yes and it gave a description which kinda sounded like it could be me only more of a store that sells Furniture rather than a person who makes videos about building furniture and also this version of me lives in Portland Oregon and I don’t so then I just asked it if it knows who owns that company and it did Nick porfard so I guess maybe there’s another four eyes furniture out there Nick great name brother I don’t think any of that information it gave me was right that said it doesn’t shock me that there would be another four eyes company but I would be shocked if it was another furniture company I would think maybe it would be an I.T or web design company or if they were more on the nose pun intended a glasses company speaking of glasses glasses are a big part of my identity obviously I would say I own more pairs of glasses than any other article of clothing other than shoes and I guess underwear but I don’t love those those are more of a utility thing I guess anyway I’m gonna do an ad read here and I know people don’t love adreads but if you wear glasses prescription or sun just hear me out so a company called Roka reached out and honestly they were making a lot of claims about their glasses and it all sounded great but I said let me see him let me try him and they said sure pick out three pairs and we’ll send them to you and they did and I’m not BS in here I was blown away so first off their frames just look really cool they got everything from more normal high end to what I’ll call a bit more unique or risky designs which I like and obviously that’s all opinion but here are the three things that stood out to me one they’re insanely lightweight I have bad eyesight so my lenses tend to be thicker but these felt noticeably lighter than what I’m used to two the Optics are really good now I don’t know if this is because of the anti-fog and reflection lenses they use or maybe just the size and shape of the frames that I picked but putting them on felt like stepping into a new world and three they’re really comfortable which isn’t some something that you might notice at first but if you wear glasses as much as I do sometimes they can start to hurt on the bridge of your nose and for me right here and anyway yes this is a sponsorship but I seriously was blown away if I wasn’t trust me I wouldn’t have talked about it this personally so next time you need prescription glasses readers or sunglasses seriously check out Roka I’ll have a link in the description of this video and you can use the code 4is20 to save 20 off all right so you just saw me cut two of my half laps and now I have to change my setup so that I can cut the other two basically each pair of legs is a mirror with the other so if you cut all four of them the same only two of them would be usable and it’s kind of hard to explain why that is so hopefully this little animation will make you believe me with that then next I have to mark out where I’m gonna actually attach my legs to my apron and for this there isn’t going to be any sort of mechanical reinforcement it’s just going to be an all glue joint and a lot of times people who aren’t into woodworking are shocked that some joints are held together with only glue and I think that’s because in their head glue is just Elmer’s school glue but wood glue like this is insanely strong I remember when I was building the desk wire desk we used this exact same joint for the legs and I wanted to test the strength so I made a quick little half lap out of some scrap and granted this was another one of my very unscientific tests but regardless this was enough to give me 100 confidence in an only glue joint like this and that’s not supportive yeah that’s so much I’m not going to hit it any harder than that so what I’m doing here is setting up for and cutting my four structures and to attach these they’re a bunch of ways that you could get the job done and since we have four stretchers we figured we’d show four ways in the course dominoes dowels pocket hole screws and regular screws in this situation none of these options is meaningfully better than any other option something you might be wondering right now is how much money will it cost and how much time will it take me to build this in terms of money it all comes down to what you use something like Walnut you’re probably looking at about 250 dollars in material and something like Poplar about 80 bucks so between those two time though that’s a little trickier obviously we all work at different Paces so it’s literally impossible for me to tell you how long it’ll take you so I guess the next best thing would be talking about how long it took me but that’s kind of tricky to answer too so a few minutes ago I mentioned that it’ll take us two to three hundred hours of Labor to put a plan together but only part of that is actually building most of the time is writing and editing and filming but even if I tried to just calculate my building time it’s still really hard because it’s so intertwined with the filming and whenever we’re filming for a plan I would say that we get about double the amount of footage compared to what we would get if it was just a normal YouTube video so here’s the sort of rough formula that I’ve come up with a YouTube build takes about two times as long as just building wood and a plan takes about twice as long as a YouTube style build so for a project like this I’d say about 25 hours of building for most people and I feel confident that that’s a pretty good estimate because I would say that it probably took me about a hundred hours to film and build mine so the math checks out all right so at this point I’ve got the top put together using dominoes and in these shots I’m drilling some pilot holes for screws and some mortises so that I’ll be able to hide the screws in a minute and I’ll actually go ahead and drive my screws in at this point to make sure that I like the way that everything’s coming together and then assuming that I do I’m going to take everything apart and this is for a couple of reasons first is that I’m going to do all of my sanding of the interior pieces right now just because it’s way easier to do a good job with everything when it’s unassembled and this is pretty much the last time that it’s gonna be unassembled and two when I actually glue things up I like to break it down into as many little steps as possible that way it’s the least stressful that it can be so here for example I’ll glue The Dominoes into the mortises in the legs I’ll partially Drive the screws through the legs and then I’ll attach the stretchers to one half and then with that done I’ll flip everything over and attach the second leg assembly foreign some of you might not recognize this tool so for those of you this is called a plug cutting bit and you definitely don’t need one of these but they really aren’t that expensive so it’s not a bad idea to just pick one up at some point and what I’ve got here in this shot is a piece of scrap that came from the same material that I had made my legs out of and I’m going to cut a few plugs from it so that I can plug up my screw mortises now if you don’t have a plug cutter you could still get this done by using a piece of dowel but if you want the best match possible you’re better off using plug cutter that said in certain situations you can’t get a perfect match and if that’s the case sometimes it’s best to purposely go for some contrast so if that had been a look that I wanted here I could have bought some Maple dowel or even cut my plugs from a piece of scrap Maple but anyway having a plug cutter just gives you the most options and like I said they’re only a couple bucks so yeah that’s my two cents here we’re jumping back in time to what is probably the most technical but also most unnecessary part of this build so you can see that this happened before I glued my base together and what I’m doing is cutting in some mortises for some bolts that will go into threaded inserts in my tabletop now in my shelf which I’m cutting here I’m going to completely skip this stuff and just use four screws to attach the base so the reason that somebody would normally consider doing this is to allow for wood movement in the top and the Shelf panel basically wood moves this way across its width the thing is even though this panel is about 18 inches wide the attachment points no matter what you use are only about seven inches apart so you really only need to worry about wood movement between the two attachment points and whatever’s going on out here doesn’t really matter so then you might be wondering why I even bothered and again there’s a couple reasons first we thought it would just be a good thing for people to see just because it isn’t necessary here doesn’t mean it’s not a good skill to have that you might find useful in another project and really that’s kind of what these courses are all about building the piece obviously yeah but more importantly learning new skills so that you can build anything and second since I’m using a slab I just think it’s nicer to use threaded inserts and bolts even though screws would be totally fine and also doing it this way will create a little wiggle room in where I position my threaded inserts so that even if I didn’t line things up perfectly it’ll still be pretty easy to attach the top in my last video I had mentioned how I’m working on creating a mechanical pencil that can be used in the workshop so I just want to give a quick update so at this point I’ve gone through two rounds of prototyping and it looks awesome I’m definitely happy with the path that we’re on but it still has a little ways to go basically there was a few proportions that fell off and I wanted to test out a few more things before I can fully commit to anything so I’ve gone back to the drawing board several times now and it’s kind of a lengthy process of refine produce critique and honestly I’m not in any sort of rush to finish it the most important thing is that it’s right so I guess it’ll just be done when it’s done now with any luck that could be in about a month from now but I just can’t really promise anything so for the meantime if you want to get on that list for immediate notification I’ll have a link in the description and I’ll keep plugging away on it I spend a ridiculous amount of time sanding touching up and finishing my pieces so you’d think that the last thing that I want to do is add to that but somehow I found a way to make it take longer we’re not talking about a measly extra hour for an extra good of sandpaper or something like that we’re talking days not one day not two days but 10 days and two hours extra that I’ve added to my process okay so basically I’ve been hearing all about this newfangled world of Nano finishing and I wanted to give it a shot but the problem with that is that I’m usually putting finish on my pieces about three days before these videos come out so I haven’t been able to actually show this step in a video before so I figured what I could do is make a tester piece that way I can show the difference that it makes and then you can just imagine it on the real piece so the products that I’m using are Blacktail Studios N3 hard coat and top coat and if you watch YouTube woodworking you probably know who cam from Blacktail studio is and honestly that guy doesn’t need any more promotion or shine but I guess my slabs do so here we are and actually it does give a bit more shine or I guess more of a semi-gloss Sheen but more importantly what it does is add a protective layer to your piece and I’m not going to turn this into a tutorial or infomercial Cam’s already done that but in full disclosure I probably should mention that of those extra 10 days and two hours that this stuff takes to apply 10 of those days are just waiting for my initial finish to cure and of the other two hours only about 30 minutes of those is actual labor the rest is just dry time between applications anyway and speaking of that finish on this piece I’m going to be using Rubio Monaco I want to take a second to quickly thank all of my patreon members before I was getting sponsors selling plans trying to make mechanical pencils before all that stuff support from viewers Like You on patreon was the engine that made doing all this financially possible for me so whether you’ve ever been or ever will be a member past present or future I want to thank you for enabling me to do all of this and I’m not going to try to sell this to you as a value proposition but some of the things that you can get are a four eyes field notebooklet a T-shirt and actually maybe not as appealing this month since we’re doing a free plan but discount codes for 15 off of our plans so to all of you again thank you seriously at the very beginning of this video I talked about how this project didn’t get off to a great start and how I wanted to try to turn a bad situation into a win a setback into an opportunity so we took what was supposed to be a desk for one person and turned it into a coffee table for all of us But ultimately the success of this project isn’t up to me it’s up to you so I hope you’ll use this course to maybe gain some new skills build a piece of furniture for yourself or a loved one that you can be proud of and help me turn this original idea from something big into something bigger thanks for watching and good luck with your build