wood working bench
“+10,000 Step By Step Plans …even if you don’t have a large workshop or expensive tools!“ Click Here 👈
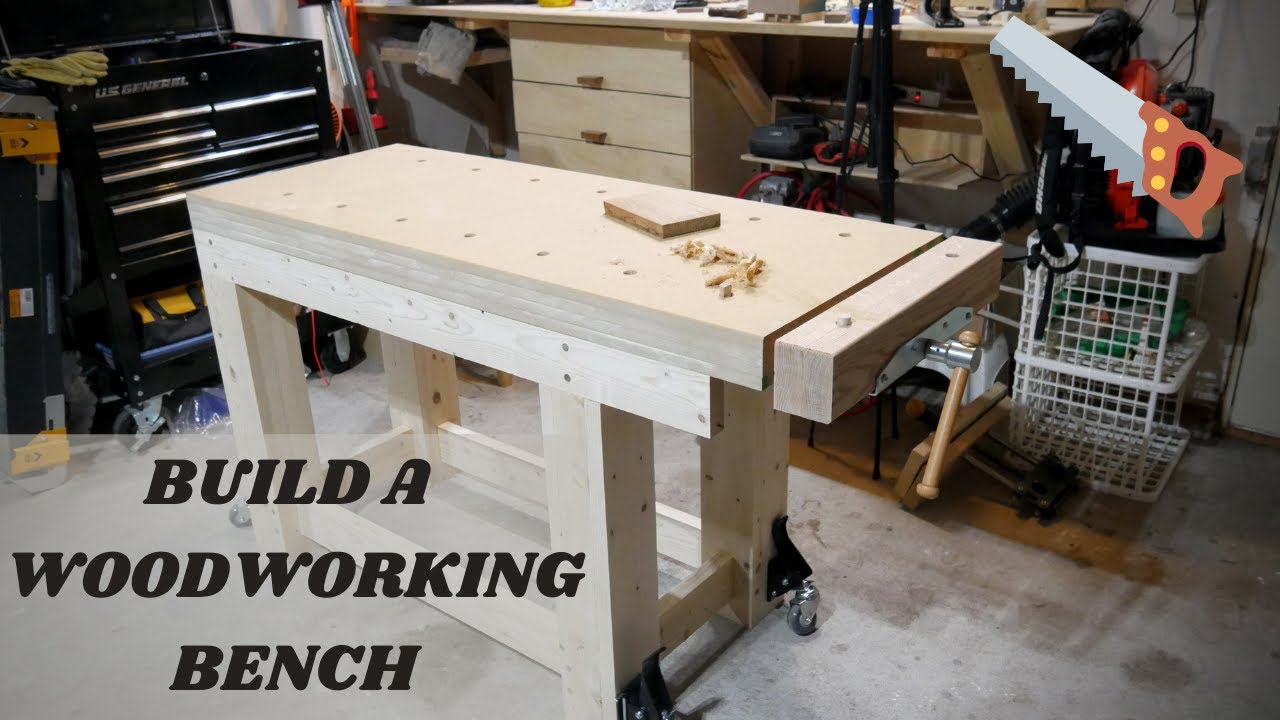
what’s going on guys welcome back to the tranq and today i’m finally gonna be building my new workbench it’s gonna be a hand tool workbench with morris and tenon legs and a heavy four inch top i’m super excited because this is gonna really uh make it easier for me to do my hand planing and my hand tool work and i’ve had had it in my mind to do it for a long time so i’m really excited to get to it let’s go ahead and get started [Music] so after a lot of going back and forth on whether i wanted to do a plywood base or like more of a traditional hardwood or in this case softwood base i decided i wanted to go with the softwood base because i wanted to be proud of this workbench when i was done and so i decided to go with just uh standard you know pine from the big box stores two by sixes as the main source of lumber for this project because it’s kind of the most inexpensive way to do it and it’s readily available so the first step was to rough cut everything to length which is what i’ve done here pieces for the four legs and all the stretchers and then the next step was to undergo a very extensive milling process and that’s because you know i’m going to be doing mortise and mortise and tenon joinery and everything like that so i need things to be square and flat and so that means spending about three hours i think i spent just doing the joint alone to first get a face and an edge flat and perpendicular to each other and you also have to realize that you have those rounded edges that come out of the store and so you have to get rid of those of course to get those nice 90 degree corners so once the jointing process was done i could then bring everything and stack it up and bring it all into the proper thickness of the planer now i wanted to do five inch by five inch thickness on the on the main four legs of the bench and so since these are one and a half inch thick boards then i had to glue up four of these but if i just left that at one and a half inches and did four of them obviously that leaves me with like three quarters that i’d have to clean off and those legs are going to be really big and bulky and heavy at that point so what i did is i brought everything down so that i only have about an eighth of an inch to plane off on the full legs which you’ll see later so once i was able to start working on things again the next step was to rip everything to the correct width and i just carefully do this i i’ve done them somewhat to the right width before but now i had left it so i’d take off just so you can see here maybe a 16th of an inch or so and the reason for that is that’s going to really help ensure that i get a truly parallel edge on there and then with that i was able to start gluing up the four pieces that are going to make up each of the four main legs and so again this is you know these are milled to now uh just over an inch and an eighth or something like that and so i just you know smothered on a bunch of glue onto these faces and clamped them down with all the clamps that i had and if as i was splewing i just wiped off as much glue as i could because it really does make a mess and it’s once that glue dries it’s just a lot harder to deal with one thing i did realize on this project is i definitely need some more clamps and i definitely need some more f-clamps because these trigger clamps just don’t quite get the pressure that you need when doing glue glue ups like this so once those legs were dry i was able to now pretty much redo the milling process on the full legs and so you see here i start on the jointer and bring in a face and an edge or really two faces into parallel and flat you can see how much how cleaned up those look at the jointer it’s pretty satisfying to watch that glue get destroyed on the jointer and then the same thing i bring it over to the planer which was pretty much maxing out my planar height uh cut capacity and but fortunately it did fit and i was able to run those through so here you can see what i was talking about you can see these are literally right at five inches now so i was really happy with that um i just was really careful when i was doing the planer now the next step was to get one of the ends all flat and squared up and to do this i would just make one cut and then turn it 90 degrees and it’s kind of hard to see from this angle but i would reference the cut i just made and just line it up by eye and i did this of course on all four sides but because of the height of my blade i left a little stub in the middle which i just came back with a plush trunk uh flustering saw and just sawed that off real quick then i just clamped these legs with the saw horses and just used a hand plane to flush up that a bit left over from the handsaw with the rest of it and again this is just getting one end set so now i have to cut these to the proper length and this is the tricky part because my table saw my crosscut sled wasn’t wide enough to set a stop lock so you can see i just attached up board to the sawhorse and i use that as my stop block stop block it’s kind of a floating board it’s a little janky but it actually it’s i mean it’s totally safe and it did work fine i actually got all my pieces cut right to the right length so this process actually worked pretty well and then same thing i had to come back with a saw a nice rusty saw here from the garage and i just had to saw off that nub that was still connecting it and this way all the legs were cut to length you probably could do this before the glue up but i like i wanted to leave them long so that i could get rid of any blue squeeze out now one thing on the remainder of this project that’s really important to keep in mind is just which leg is which two of them are obviously going to be identical based on the geometry of the bench but you just have to keep them organized so now i’m coming in to start marking some of the mortise and tenon joinery so i first scribe a line that’s going to be the bottom of the mortise then here i’m just sketching in roughly the three inch distance that the mortise is going to uh height that the mortise is going to be and that’s just so i’m not scribing where i don’t need to be then i come back with the marking gauge this is the veritas dual marking gauge which is really good for lining up this sort of thing and i lay out the two sides of the mortise then i use a pair of dividers here to mark the exact three inch length and then i just use that same pair of dividers on each mortise to make sure they’re exactly identical now to hog out the majority of the material i bring it over to the drill press and here i use a forstner bit corresponding to 1 32 of an inch less than the width of the mortise this is just to make sure that i don’t accidentally drill over the line you could try and do it all in one attempt but i prefer to just leave it a little undersized and get everything trimmed to size or cut chopped to size with the chisel and that’s what i’m doing here now this pine is super grainy stuff and you know my chisels are very sharp but it’s you just still get a lot of chippy big pieces of grain blowing out so you just have to be careful watch the green pattern otherwise you’re going to get splits and and it’s not going to look very good even though the joint will actually be just as structurally sound so this is just a matter of a lot of chopping but i just creep my way up until there’s about a 16th 32nd of an inch left and then i chop to my marking line so mid job here i realized i should probably do a quick sharpen before i get to the rest of the mortises just to you know a sharp tool is going to make it safer and easier to do so and once i have that all strapped i do a quick reality check and it seems like they’re cutting fine and that night i was inside the garage and i just got right to work with the rest of the mortises so this was a pretty time consuming process because i was being real careful with everything and i wanted to you know even though if the mortises are slightly undercut they’re going to work fine i just wanted everything to be really as strong and do the best job i could on it because you know why not it’s how you should do everything so i just took my time with this operation and took care of all this waste i ended up finding that using this sort of butcher style handle or grip on the chisel worked well for clearing out the waste just because the chisel in this sock would just melt through it and there’s really no need to use the hammer now i use this tiny chinwa square which is just tiny and fits in there just to double check that all my mortises are at 90 and that they’re not or slightly undercut that way the tenons are actually going to fit in i’ll have a link to that tool and the other some of the other key tools in the description so the next part was to fix my shift my attention to the tenons and there’s a lot of way to do these you could cut them by hand i found it really actually quite simple and quite uh accurate just to do this on the table saw and i just use a stop lock here so that i would reference you know each tenon would actually have the exact same height or depth whatever you want to call that on the tenon and it would have been nice to have a dado blade for this or a data stack but i got by just making repeated cuts and then you can see there i drag the piece across the blade once they’re all cut and that just ensures any sort of i was using a flat ground blade but that’ll still just help ensure that it’s all completely flat and i was actually pleasantly surprised with the results of doing this for the tenons especially with the flat ground blade if you use a regular blade it’ll turn out okay but the flat ground blade really made a good result on those now the next step is to do these they’re kind of mortises but they have one open side and these are at the top of the legs that are going to take except the top stretchers these ones are slightly wider mortises and i handle the waist the same way i did with smaller mortises at the base of the legs which is just by hogging out the material with the forstner bit slightly undersized that’s going to leave me with excess that i can come clean up with the chisel and i didn’t show this before but to get a marking line to work to i just carefully line that up with the tangent of the holes that i drill and then i just scribe that line across that gives me a shoulder line to work to with the chisel so you can see what i mean here that you can really you don’t even have to really hammer with this pine you can kind of just pull the chisel through and as long as the chisel is sharp it goes through the material real easy then again i do that butcher grip on the you know on the chisel here and just take down everything until it’s at 90 degrees and with that i do a quick dry fit to make sure things are fitting right and you can see i get a nice tight fit which is exactly what you want once you get some glue in there the wood’s going to slightly swell and it’s going to be a really strong joint so i did a dry fit on the full thing i didn’t show it here but i was really pleased with how all the joints were going together at this point here’s just an overview of those joints those bottom mortises for the lower stretchers and the top mortises for the top stretchers and this was a really exciting point to be at this spot so the very last step was to do some large dados i guess you could call them or like very large rabbits at the top of the legs and this is going to be to accept the long stretchers if you look at the plans you’ll see exactly where these are i used the marking gauge to mark the line i think these were four inches from the top and so i set up a stop block and you know i just go with the same process of of making that dado as i did with the tenon which is just making a ton of cuts with the cross cut slots off and again it’s a little time consuming but it gets pretty uh robotic you know you know you want to be safe and careful but you do get pretty quick at it and then here i again just drag that piece across once i’ve made all the cuts to help clean it up now before i actually glue up the legs i want to drill in these holes which are going to be for the pins or the dowels that i’ll be using once i do the whole blue up the reason for this is if you do these holes now that’s going to give your drill bit which these are half inch dowels a vertical guide to use to drill into the tenons and that’s just going to help things keep things straight and keep things aligned the last thing i do before glue up is just chamfer the cheeks uh cheeks or edges of the tenons and that’s just gonna help those kind of go into the mortises a little bit easier especially when again once you get the glue in there they’re gonna swell a bit and those joints which are already tight become really tight and you’ll see that it didn’t it didn’t create issues for me but it definitely made the glue up kind of a struggle and i was joking last thing i really do before the glue up is drilling some pocket holes on the top stretchers because i’m going to be doing an mdf top and so i’ll just be attaching that with pocket hole screws and so here i’m just drilling out those pocket holes in the in the stretchers before glue up obviously that’s a step you definitely want to do before you attach them and i cut a bunch of walnut pegs for those dowels and then it was on to glue up this now here’s a thing a tip i guess that i’ve discovered recently is to avoid glue squeeze out is to put a little bit of paste wax on the areas that you don’t want the glue that are near the glue joints and the glue will absolutely not stick to the wax at all you can just come through and wipe it off and it’s actually works really well so i put that around the tenons just around the shoulders of the tenons just to keep the glue squeezed out under control and i started off by gluing the two each uh end set of legs so the two two end legs i glued together first and these this glue up was pretty simple i mean you just had to get things lined up and then you know i clamped it really as good as i could i actually ended up going out to buy some more clamps at this point because i wanted like i said a few f style clamps because sometimes these parallel clamps and these trigger clamps they just really don’t quite have enough clamping power but once that glue set this is where i came with the hand drill and using the drills the holes i already drilled as a guide i can just drilling for the rest of those dowels so at that point i’m actually drilling into the tenon itself and i just put a little bit of glue on those dowels and then just hammer those home this is another one of those points where it’s just it’s really satisfying to see those go right where they should and hear them bottom out and i’ll tell you what those are some strong joints those are not going to come apart anytime soon i just then use a little flush cut saw to saw those dowels off and i leave the sanding for later you know i i’m not going to be putting a finish on these legs so it’s not i wasn’t super concerned with the exact looks so here you can see i got some of these huge 60-inch bessie para or not parallel clamps um whatever you call these clamps and these things i was seriously impressed with the amount of clamping pressure i needed a ton of clamping pressure to actually pull those tenons all the way into the mortises because once the glue got in there they really swelled up and i just did that by going back and forth wrenching down on the clamps and i was i was really impressed with that and they worked out great for this and i actually glued on these top stretchers at the very end because things were already set in place and i just applied a little bit of glue and just clamped those on these are the only joint that don’t have an actual like mortise so to speak but it’s really easy to line that up and glue it in and it is reinforced still with the dowels so it’s still a plenty strong joint but you could you know i could have designed it differently such that these were going into some sort of mortise or something so with the legs finally done it was time to switch attention to the top as i said i’m going to be doing an mdf top i’m doing four sheets of three quarter inch mdf to make a three inch thick top and that’s going to be plenty thick for the operations i’m going to be doing but one problem is how am i going to clamp this thing when i glue it because i don’t have 500 clamps so after a bit of digging i found online that a good way to do it was lay out a grid of screws like i’ve done here and so before i start gluing i lay out and pre-preset those screws in place and then i start gluing up the top and i just cover the entire face with glue start stacking the sheets and then i leave the one with the screws for the top and by top i mean that there with the screws is actually going to be the underside of the top so that you don’t see it but once you have that lined up i uh clamp it down with four clamps to kind of keep it in place and then i put all the screws in and that’s going to be basically acting as my clamp i did still come around and add as many clamps as i could to the perimeter just to help it out now the next step was to level out the top of the base or leg assembly and i started by doing this with a hand plane but honestly i was just finding it really hard to get things dead flat across this entire structure and while they were mostly flat probably flat enough to go ahead with the glue attaching the top i just wasn’t totally satisfied with where it was at so last minute i decided to make a quick router sled and do this you know basically slab flattening or bench top flattening jig where you clamp two boards parallel on the sides of the legs use a piece of string corner to corner to make sure they’re coplanar and then you bring the sled with your router and you just slowly increase your cut depth until you’re taking a full pass across the all surfaces of the top and this took a little bit more time than i wanted to do but it ended up really helping get that flat and i was happy with the result with that as well now i’m using a shoulder device for this this is the showberg adjustable vice recommended by rob cosman and he said that you know it’s a really good uh it’s a it’s it’s an expensive device but it’s really strong and it’s really quite easy to install and i would agree with that so far i’ve been loving the vise it really the square tube instead of the round tubes helped a lot with decreasing the racking uh which is really great so i’ve been happy with the vice i was happy i went with it the only thing left to do was to create a pair of jaws for the vice and for this i’m using some five quarter red oak and gluing two of them together to give me a ten quarter i guess uh uh jaws for the vice and this is really strong stuff it was very dense very heavy and it’s gonna you know it’s gonna create a nice jaw to use for device now because of the design of the showbird vise you do have to make some cutouts here to actually install the jaws so i just carefully measure these and transfer the measurements onto the onto the wood here and then just again use the table sawn crosscut sled just cut those slots out i then needed to drill the dog holes in the top and this was a very frustrating process because i don’t know if anyone has a good idea of how to you know really do a good job of drilling these dog holes and a three inch top be sure to let me know i ended up going with this drill guide from rockler and a lot of manpower in standing on the bench in frustration but i eventually got it and i had to come back the cut that didn’t even go all the way to the bench so i had to finish that with an auger bit but man those dog holes were a huge hassle so once the dog holes were done i used a router with a little bit of a round over bit in it to just clean up some of the edges of the bench as well as give a bit of a round over to each of the dog holes and that’s pretty much purely aesthetic there’s really no need to do that and then i came through and sanded the whole outside of the bench just to get rid of some of that glue you know the glue squeeze out and white glue marks that you see everywhere now last thing was to install these casters which are removable casters which is awesome because you can actually set this bench down and have its full strength and weight on the legs on the ground but then you can also make the thing totally movable just by throwing the casters on and lifting it up and i was very impressed with the ability of the casters to lift this thing but with that this bench was done i was super excited it’s a project i wanted to get to for a long time so thanks for watching i’m going to close out this video and you can take a look at some of the final shots of the bench here [Music] all right that’s going to do it for today’s video i am super happy with how this bench turned out i was a pretty big project to take on and it is literally rock solid so i really love this thing and it’s going to be coming in super handy for all sorts of projects and for this winter it’s going to come in handy for the brand new lathe i got so if you guys want to see some turning be sure to stick around if you enjoyed this video be sure to subscribe to my channel check out my other videos i have plans for the bench that i’ll be posting uh so thanks for watching guys we’ll see on the next one [Music] you …