Here you can find Solar Panels and technological accessories related to Solar Energy: Click Here
If you want to learn about Solar Panels, to advise you before buying or to build your own Solar Panel: Click Here
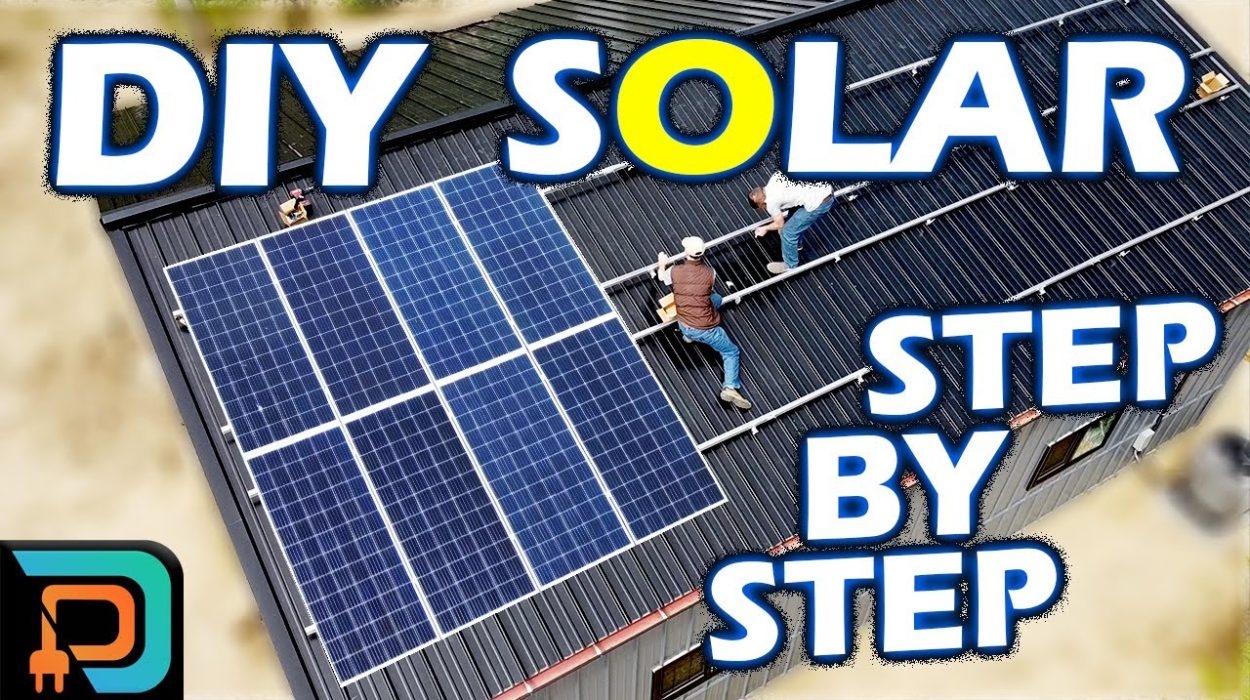
Welcome back to Projects With Everyday Dave! I hope you have a really exciting install today I’m here at my friend Dan’s house and he’s just finished this Morton Building it’s going to be a really nice shop what are you going to do in it Dan we’re going to build an off-road uh Jeep yeah with the kids that sounds like a lot of fun great experiences and Dan wanted to supplement the power for this new building as well as add some power to his house by putting a solar install on his roof I’ve done a solar install at my house and it’s a ground array but there’s no place for a ground array here so we’re going to put it up on his new building fortunately it’s a steel roof so we don’t have to worry about shingles deteriorating today we’re going to use K2 systems racking for our roof install and I want to show you some of the neat things that they have and why I chose to go with that system all right before I get started I want to go over the racking system that we’re going to use for this we’re going with K2 systems racking now the way I came across K2 systems was with this mini rail I was looking for a lightweight solution that I could apply to this corrugated steel roof now this mini rail system is really neat it’s lightweight easy to ship it’s expandable really flexible solution it can be applied to lots of different surfaces there’s a seal on the back that seals any penetrations this screw is self-tapping runs right into the steel roof seals with the seal prevents any water from leaking it’s a really neat solution the other reason I really like their system is their clamps are self-bonding they’re really easy to install they have a flexible plastic clip you simply push the nut in give it a quarter turn and it’s set in place easy to install the panels you can slide it back and forth it’ll stay in position the other thing that’s really neat about these is because they’re self-bonding you don’t need to connect one panel to another using a separate grounding system these clamps bite into the aluminum and create a bonding system through the panels themselves you only need to ground each string independently they also have this really neat hidden clamp it’s called the yeti clamp it slides on and allows you to connect the panel from the inside so you don’t see the end of the panel now these clamps are interchangeable and they go with any of their racking systems now unfortunately Dan’s roof has a smooth corrugated top and this system requires a flat trapezoidal top so we’re going to use their long rail system with these L brackets to attach it to this roof and in order to use these L brackets this long rail has a t-nut that simply slides in the bracket will go over that and we’ll bolt it on and to hold this to the roof we’ll be using these ejot Fasteners these e-jot Fasteners have a nice seal there’s several versions of them with flat washers for going in the bottom of the corrugation or a curved cupped washer which we’re going to use for our rounded corrugation I made a mock-up here so I could confirm that there wouldn’t be any water leak issues these bolts will go into through the corrugation and into the wood purlins which makes a very secure connection and then we can slide these L brackets on top and bolt them down in place and put our rail system across that the nice thing about these bolts because we’re going into the purlins we can simply remove an existing screw make the hole a little bit wider put them through that screw hole and screw it into the purlin the washer forms around the corrugation giving us a very nice tight seal and provides a very stable mount for our rail system so now that you understand the system why I chose this one and what we’re going to be applying let’s go ahead and get it installed on the roof fortunately Drew from K2 systems decided to join us today for this install and he’s going to give us some tips and tricks on how to most effectively install the racking system so Drew how do we start with this all right thanks for having us Dave first thing we want to do is get our measurements of the solar panels so we got our length and our width Dimensions from the jinko 385 watt solar panels were installing today and we’ll come up top measure the full length of the roof so we can Center this array out east and west and also get a measurement from north to south get our full length of the roof north south so we can measure so we can measure up and square it out north and south as well so we’ll have a nice Square Ray sitting centered on this rooftop then we’ll measure out the total length of what the array is going to be 12 panels long of what our dimensions of our jenkos are and then from there start measuring out where our mounts are going to lay so we have we’re going to be staggering our mounts 48 inches on Center which means we’ll have our first row of mounts going straight across at 48 inches and then from there each each and every row we’re going to stagger One Mount 24 inches and then run the full length 48 inches so that we have our load sitting on different areas of the purlins and on this particular roof the purlins are two feet apart so we can either have our rails at a two foot pitch or a four foot pitch and a four foot pitch works really well giving us the appropriate cantilever on each side of the panel now that we have our layout set up let’s go ahead and get the e-jaw Fasteners put in this roof already has Fasteners that hold down the corrugation so I’m simply going to remove one of those then I’ll drill out the steel to a diameter large enough for the bolt being careful not to go into the wood then I’ll use a little bit smaller drill for the part that goes into the wood and we’ll drill into the purlin I’m going to keep the drill perpendicular to the roof so the rails align with the roof appropriately now that I’ve drilled that out there is a hole in the top of the bolt that allows me to shoot the bolt Into the purlin Now The Roof is held down the corrugation is sealed and we’re ready to put our L bracket on for our rails now you may run into some issues like we did whoever installed this roof mostly missed the purlin with their screws in some cases so we can’t just pull out a screw and put ours in in the same location we have to put ours actually into the purlin that’s what’s structurally holding the solar panels on the roof so here you can see we added a little bit larger washer around the screw that had missed the purlin then we drilled an additional hole right here where the purlin actually is so that we have a good structural mount for our racking system so in some cases we couldn’t just pull the screw out but here’s the solution we came up with to manage it now that we have our ejot Fasteners in the roof we can set our mid-plane bolt on the threads where we want to set the entire array and we’re going to put ours about the middle of the bolt to give some flexibility now we’ll set these L brackets and we start by putting on a washer above the bolt and put on the L bracket another washer and then there’s a lock nut to put on top of that we’re going to put these in just slightly tight so that we’ll have some flexibility in the rotation angle of the bracket when we set the rails all right to set the first section of rail we’ve laid the rail out on the roof and our L brackets are a little bit loose so we can pivot them around we need to slide things to put this in we’ll take a t-bolt and just slide it through the slot in the bracket turn it 90 degrees and then thumb set and left then I can move to the next one simply Slide the nut through the bracket slide it into the slot give it a quarter turn and then temp set the nut all right now we’re going to put a joining bracket on and this bracket will join however many rails we need to and it slides right over the profile very cleanly now the convenient thing about this profile is it has a wide slot in it so we can just slide the t-nut through the hole turn it 90 degrees and slide our nut on super easy to connect and now we’ll take our next section of rail and slide it into the bracket [Music] and in this case we’ll leave about an eighth inch Gap so that for thermal expansion the rails can expand and contract and then just put the t-nut through the hole turn it 90 degrees and attempts that are not we’ll work our way down okay we have secured the top Rail and we’ve squared it up with the first section of the bottom rail now to make sure that everything is straight we’ll run a string line from the top rail to the bottom rail and Slide the center rails to match and that way everything will be in alignment and now we have a nice straight line to make all of our Center rails adjust to which if we hadn’t done the whole rail we could just easily slide it so the the pro tip here is temp set just the first section of rail not the entire roof so that you can slide it to the string a lot quicker and easier okay the top rail height is set now we’re going to set the height of the bottom rail relative to the roof all the way across and then we’ll use the string to set the center rails to match that height so let’s go ahead and loosen that okay right there there we go all right now that we have set the top and bottom rail to height or we’re going to bring the center rails up to match that we’ll just use a string line to achieve that there’s a little loop on the end of the string and I’ll set this around the bolt on the bottom rail then have someone hold it at the top now we can get our entire array completely flat by matching the two Center rails to the outer rails all right now I can bring the rail up to just match the string and then tighten that bolt then I can do the same thing with the bottom rail bring it up just to match the string and tighten that bolt now we’ll work our way down and tighten every bolt so that the center rails match the outer rails we want to install and pre-wire all the optimizers in order to put them in the right place we simply measure the width of the panels and then Mark that width out on the rails with a marker and then place our modules just to the right of that Mark so that they’ll all be in the right position when we connect the panels and lay them down okay now that we have our rails marked for all the optimizers are going to go we’ll use the optimizer mounting Fastener which is just like all the others you simply push it down in the rail and give it a quarter turn and it can slide back and forth to get it positioned exactly where you want it if you can you can slide this under the bolt sometimes it’s easier to remove it as long as you don’t lose the washers because you need to make sure that this cutting washer is on top of the optimizer that’s what’s going to ground the optimizer to the rail system it cuts through the anodized coating on the optimizer back plate foreign to the rail and we can put the rest of them on this is the very last Optimizer on this string so one of these will be connected to our extension cable and the other one will connect to the next Optimizer okay I have a spool of 10 gauge solar wire and I’ll put a link in the description to below to this and all the other things I’m using here I’ll come off the positive in this case that’s why I use the red cable and I’ll connect these two and that’s a secure watertight connection and the reason I’m doing this now is I want to be able to tuck this extension cable in under the optimizer inside the rail all the way down that’ll give us nice tight wire management we won’t have any issues with wires coming undone or Tangled under the roof later so now that I’ve connected this we can go ahead and put the next set of modules on and from there on each module each Optimizer will connect one end to the other we have two styles of Clips here that we’re going to use to manage these cables one snaps over the rail and the other one goes on the outside of the rail to hold our wires and the reason we’re going to use both is we want to manage the wires inside the rail in most cases so we’ll keep these wires up nice and tight to the optimizer and then I can just snap this rail clip right over the rail and that just holds them neatly in place and I can work my way down but where we have an mc4 connector we want to put that outside the rail just in case water or something collects inside the rail we don’t want that sitting around the joint so in that case I’ll use these two clips here to set the wires on the outside of the rail where the mc4 connector is and then we’ll just come back into the rail after that now that we have that safely outside the rail we can go ahead and run our extension cable the rest of the way down the rail and put the rest of our optimizers in okay we’ve got a couple of my optimizers in I just want to show how we’re connecting all these we’ll take the negative from this Optimizer and connect it to the positive of the previous one so I’ll do one Loop of that wire under the module and then the opposing connector will head down the rail the other way so it has one Loop going under it that way all of these wires will be completely captured under the panels and we don’t have anything touching the roof so now that I have those wound up the way I want them I’ll tuck them into the channel I can twist my Optimizer Connector into the rail set the optimizer over it make sure that I have all my washers stacked up and now I can connect the two optimizers to each other the tight water kite connection which we will Mount outside the rail okay we have all the rails down and all the optimizers attached to the rails so we’re ready to put modules on we have wire management Clips holding the wires in the rails and then where we have a connector we move the connector outside the rail just to make sure that it’s never sitting in water and then we have the rail Clips to hold those on the outside and then we coil the wires up under the optimizer and use the Fastener to hold them all in the rail the goal is to make sure nothing is sitting on the roof here you can see everything is tucked up neatly there is nothing anywhere near the roof so we don’t have to worry about anything snagging those wires or causing any problems at the end we have our extension cable ready to go down to our connector box so there will be one connector left from the end Optimizer and the extension cable bringing from the other end of the string two strings two sets of wires to minimize cost on this project Dan purchased clearance jinko panels from Santan solar you can also purchase the K2 racking we’re using through them you’ll find a link in the description below okay we’re going to prep the panels before we take them up on the roof so that we’ll be able to just walk them up set them in place and connect the wires in order to do that we need to do a little bit of wire management on the back of the panel because these are going to be up on the roof we want to make sure that the wire is never sag so I have a couple of wire management clips that we will use to slide on the edge of the solar panel so first I have to remove the zip ties holding the wires together I’m going to place the clip so the wires will be managed up under the panel these clips can manage two wires I want to make sure that there’s a smooth Arc so we don’t bend the wire too tightly and then I’ll put one more on the side so now our panel is ready to be connected to the optimizer and we won’t have to do anything up on the roof other than connect the wires and set the panel down thankfully I have drew here to show us the professional way to carry panels up to the roof he grabs the panel just below the center line and rests it about the center line on his elbow and then over his shoulder and his head to carry it up the ladder you need to have a harness and if you don’t have one you can get one from a big box store or Amazon for less than 100 bucks have someone clip the harness in at the top and then you can securely carry the panel to its location if I lost you at harness up and carry solar panels over your shoulder up a ladder then today’s sponsor energy pal may be the right solution for you if you want to lower your utility bills with a home solar system like mine or Dan’s but you’re not ready for DIY then click this pop-up Banner or click on the link in the description below and go to energy pal for a free custom home solar quote you just fill in the form and their advisors will help you pick the right system that makes sense for you and your home it’s super easy and completely free I’ve personally talked to the owners of energy pal and their customers before choosing to recommend them to you nine out of 10 homeowners who Go Solar through energy pal say they got the best price and Equipment through them for a limited time using my link will get you an additional 500 rebate once your system’s installed so use the link in the description below go to energy pal and see a solar is right for you in your home now for the rest of us diy-ers back to work since we staged the wires down below it’s very easy to just click the positive and negative mc4 connectors to the optimizers and then we can rotate the panel down and bolt it in place after we get about three panels in place we’ll make sure we’re running straight before we continue on we want to set the mid clamp so that the spacer is below the panel but it’s loose enough that the next one will easily slide under they slide easily in the channel so we can just do the quarter turn set them in and slide them up okay we’ve put most of the first row in we’ve left one panel out on the end so that we can do our wire management off the end of the roof we made some very slight adjustments to make sure that the row was running straight across the roof now that the bottom row is in except for one panel we’ll go ahead and do the same for the top row hey Drew here with K2 Pro tip so we got the first row of panels already set Square those off made some minor adjustments to get it nice and square with the roof now we’re starting to set the second row of modules and the way to do that is you can butt it up right against the panels or I like to add a little air gap and to do that we have we could just use the same L brackets that we used on the e-jot mounts to mount the racking to the roof so you just throw a couple of these down and this will end up giving it nice quarter inch Gap between the module rows for a little airflow and a little thermal expansion and contraction nice and square now we’re ready to hit our end clamps we’re not recommending you put your kids on the roof but just like me Dan likes to get his kids involved to learn the process there you go let’s put one more clip in here just to make sure we don’t have any issues so pop those two wires in the back of that clip okay now you can rotate the panel down it was a lot of fun to have them install a panel and see their sense of accomplishment at having a real part in building the solar system with the rest of us okay make sure it’s pushed up yep it is it is there and it is down there okay go down there yeah you can one foot up there you go I’m sure they’ll never forget putting that panel in and who knows what they’ll build when they grow up there you go okay hand it off a little bit more there you go all right you did it okay we’re gonna put our junction box together and I’m gonna lay out exactly what we’re doing here on the table we’ll build the box here and then we’ll take it up to the Ray and put it in place so we have a two inch tall to make sure it fits underneath our solar panels five by five box and within it we’ll use a DIN rail connector that will mount to the bottom with a couple of screws we don’t have to worry about things being perfectly sealed we’re going to put a small hole in the bottom corner to let any condensation that does get in there drain out then we have an inch PVC conduit that’s going to come in the bottom and that’s where our THHN 10 gauge wires will come up there will be four of these wires coming into the box and then we will use these sealed connectors in order to bring the PV wire in we have a mc4 connector that connects to the optimizers and then the other end will be bare in order to connect this to the solar to the racking system here’s a chunk of the rail that’s already up on the roof we’re going to use t-nuts and slide them in into the rail we’ll put two t-nuts in the rail and we’re going to drill holes in the side of the box and that will allow us to mount this box rigidly to the rail so let’s go ahead and drill all those holes get everything mounted and then we’ll put it up on the roof and has this nice set of Step drills that allows us to move right up on the size hole that we need it’s really convenient give us a little weep hole in case any moisture gets in we mounted the DIN rail with a couple of self-tapping stainless steel screws can simply snap in whatever number of DIN rail connectors you need and in whatever order you want then we’ll just add our one inch threaded adapter for the conduit connection okay we’ve installed all of the panels except for the final two that way we can do our junction box and wire management and then drop the final two panels in so let’s set the junction box so it’s going to put it right here that runs us just inside the soffit does that seem good Dan did not want to make any penetrations in the roof so we’re going to run the conduit over the edge of the roof and then back to the building okay now we have our box firmly secured to the rail okay now we have our extension cables run down we’re running them through the grommet into our Junction block these glands tighten the seal so we can just slide our wires through them and then later when we’re ready tighten them down after we have everything adjusted a little Bend in The Wire slide it into the terminal and then we can tighten it down if you’ve watched my other video on these terminal blocks these are very very secure there we go and then these are rigid they will not come out then we can tighten our glands makes a nice watertight seal and also holds them into position so now those are secured and we’re ready to put in our other extension cables and then I added a little bit of a relief coil here that will secure to the rail in case anything ever changes later we won’t run out of length of wire okay we’ll make up an mc4 connector up here to do our final extension over to our junction box strip a small portion of insulation that’s going to go up inside the the crimp pin disassemble the nut make sure the seal is facing up put the nut and the seal on The Wire first then here’s the pro tip set your connector into the tool first then you can just slide the wire in and it holds it all in place for you crimp it down make sure it’s secure snap it inside the head make sure that’s tight put the seal in place and then thread the nut over top you can get these simple tools that they come with that allow you to quickly disconnect them and they also act as a wrench to tighten them down it really helps get a little bit more force on it there it is nice and tight now we can connect to our string nice tight watertight connection ready to go to the junction box I’ve run the positive and negative leaves off the top string and tucked them up underneath the second to last panel and secured them they’re secured up under the panel all the way down then they meet up with the positive and negative lead coming off of string two and then all four wires are tucked up under that final panel and then I put a little relief coil in here in case something wants needs to change later we have the material to do that but it’s all secured so it’ll be up off of the roof and then it comes in through our glands into our DIN rail connector and then we just have to do our THHN cable through a conduit that we haven’t run yet so put a cap on that and get our conduit run nice and clean no wires hanging down anywhere the inverter has a massive heat sink on the back and that’s what allows it to run basically silently it distributes all the heat from all the components on the inside because of that we have to make sure we have eight inches of clearance on the top and bottom and four inches of clearance to the right and left of the unit in the location we install it we’re going to use a piece of cement board behind the inverter just for extra Fire Protection you can hang the mounting bracket on the wall put a center screw in then we’ll get it leveled up and hang the inverter simple as that was way easier than what I was going to try and do the solar Edge inverter is lightweight and easy to mount it has predefined locations for conductor penetrations you can use conduit and THHN or in our case just a wire clamp be sure to know the codes for your area okay our inverter requires a 40 amp breaker and you want to put that at the bottom of the panel now in this case the panel is fed from the bottom so we’ll put it at the opposite end which will be the top of this panel so I’m going to go ahead and turn the power off to this unit and then install the breaker at the opposite end all right I cut off cut off a piece of six gauge wire now we could use eight gauge for this but I decided to go with six gauge so that we would reduce the Heat and losses there’s a 120 rule for adding a backfeed breaker if you have a 200 amp load Center you can have a Max of 240 amps feeding It generally a 200 amp breaker for the line input and a 40 amp breaker for the solar input with this type of Junction Block it’s very critical that you strip the specified length of insulation and make sure the conductor is completely seated into the connector insert your screwdriver into the release hole and make sure that the conductor is completely inserted into the unit before you remove the screwdriver give the wire a good tug and make sure it’s secure if not you can have a high resistance connection that could result in a fire we round our neutral to the neutral bus and then our line one and line two to the two legs of the input breaker which we’re leaving in the off position for now because we’re not ready to power up our unit but now the breaker panel is wired we can put the cover on and put our stickers on with the junction box installed and the inverter mounted we simply need to connect the two with our one inch conduit three-quarter would be sufficient for this run but one inch gives more flexibility we’re running over the edge of the roof so we added an L bracket to the edge of the roof to support the conduit then with a combination of 90 and 45 degree elbows we worked our way over the soffit back to the side of the building and down to the ground keep in mind National Electric Code limits you to four 90 degree bends between pull points we used a couple of 45s to smoothly come back to the wall from the inverter and then 190 degree takes us right out of the building the ground run along the outside of the building was the longest stretch so it was easiest to pull that length first then feed up to the roof and into the inverter using a fish tape as usual I made a loop in the conductor to make sure there’s a little bit of room for flexibility we don’t want to run straight out of the conduit and right into the lugs perfect everything’s wired up the nice thing about the solar Edge optimizers is they hold the voltage from each panel to one volt during setup so there’s no more than 12 volts available on each one of these lines right now now we just have to cap it off and we’re good to go okay we have the final connections made I’ve installed the ground wire and it connects to one rail from the top string and one rail from the bottom string and since all of the clamps along the panels are self bonding we don’t need anything else except to connect the ends of the two rails and then that ground wire goes down to our stake in the ground finally we added the DC junction box warning label and the wiring on the roof is finished do not run directly out of the conduit into the junction block give yourself several inches of conductor to work with when making the final connections on this type of inverter it’s very critical to make sure you strip sufficient length of wire insert your screwdriver into the release hole and make sure that the conductor is completely inserted into the unit before you remove the screwdriver give the wire a good tug and make sure it’s secure if not you can have a high resistance connection that could result in a fire now I can test the connections make sure it’s all working properly and then we’ll put the final two panels on it’s a nice feeling to put the last two panels in and finally be off the roof I know I should have a harness on I’m sure I’m going to get plenty of comments about that we’re going to use hidden Yeti clamps to secure these last two panels in the nice thing about that is you can’t see the clamp on the end and you can put a nice finish cap on and it really cleans up the end of the panels in fact you can cut the rails off flush with the panels if you want to I left a couple inches extended here just in case in the future we use different panels that are a different width we’ll have enough rail to install them all right all the panels are in ready to turn it on now we’re going to put labels on and it’s important to put all of the appropriate markings on the inverter the cables the conduit and so you can get this pack of labels and it will have everything you could possibly need so we’ll just sort through that find the labels we need and stick them on we already placed the warning label on the DC junction box on the roof and the photovoltaic power source label in a few places along the conduit all right we’re going to place a few of the stickers on the inverter we need to put DC disconnect under the DC disconnect this is the main DC disconnect for the whole system and then it’s very important that we don’t disconnect this under load you have to let the systems shut down slowly to bring the load down before you just turn this off so there’s a warning for that and then if someone takes this cover off we want them to be aware that these DC lines will be energized and then this sticker will allow us to indicate the actual voltages and current that the system is set for and then we wouldn’t want anyone cutting into these lines not being aware that they could be hitting high voltage DC so we’ll put a warning label here and a few other places along the conduit so everyone knows exactly what the purpose is for the breaker itself we put in a sticker for not relocating this device we want it to be at the opposing end of the input power so that the bus bar is balanced and then a sticker that warns everyone that this is a foldable tag power source and then on the panel itself we put a sticker to show that there is a back fed breaker in here just so that if anyone opens it they’re aware of that from the beginning this is the main panel for the house and we want to make sure that if anyone opens it that they’re aware that there is a dual source for that so we’ll put a warning sticker on that panel and then this is the AC disconnect this will allow the utility to disconnect the photovoltaic power which is coming from the shop so this actually disconnects the entire shop and the full overtake system from the utility connection so if the utility ever needs to work on this they can shut this off and not have to worry about the solar panels energizing this panel and we’re ready for our inspection all right now that we’ve run both the AC and the DC lines we can use the setup app for this particular inverter to get it commissioned now every inverter is going to be a little bit different so it won’t go through all those details but we’ll turn on the AC breaker and the power for our inverter and then I’ll just use the app for solar Edge to go ahead and commission it and then we’ll be able to see online what it’s producing it’s not going through a process of updating the firmware all right all the firmware has been uploaded and now because this is a system with optimizers we need to connect each one of the optimizers in a process in a pairing process so the app has us turn on the DC so that’s this switch we’ll go ahead and turn on the DC there has to be some light outside for the panels to actually be putting out some power and now I can start the pairing process now the optimizers are talking to the inverter across the DC lines using a high frequency communication and it will work its way through every Optimizer identifying it and then it will send that information through the internet to our app so we can track each panel individually all right pairing is successful okay it took a couple minutes to monitor the grid and make sure that it matches the sine wave and there’s no issues there all the pairings complete and the inverter just clicked on and we’re producing 857 Watts right now we’ll be able to pull up the monitoring app and see how each panel is performing it’s at 415 volts DC and we’re up and operational all right Dan we got all the panels in wasn’t super easy getting those panels up here but looks great it’s all installed what do you think it’s amazing better than I could have imagined so I’m excited to see what kind of power it produces and the money I can save let’s get it powered up and see what we can make thanks Dave awesome if you have space I always recommend installing a ground array you can watch the step-by-step installation of my nine kilowatt ground array right here if you’re looking for a smaller scale project follow along with my three kilowatt shed array right here you can find links to products used in this install and lots of helpful information in the description below lots of great projects coming up I’ll see you next time …