cabinetry tools
“+10,000 Step By Step Plans …even if you don’t have a large workshop or expensive tools!“ Yes, Get Access To 12,000 shed Plans! 👈
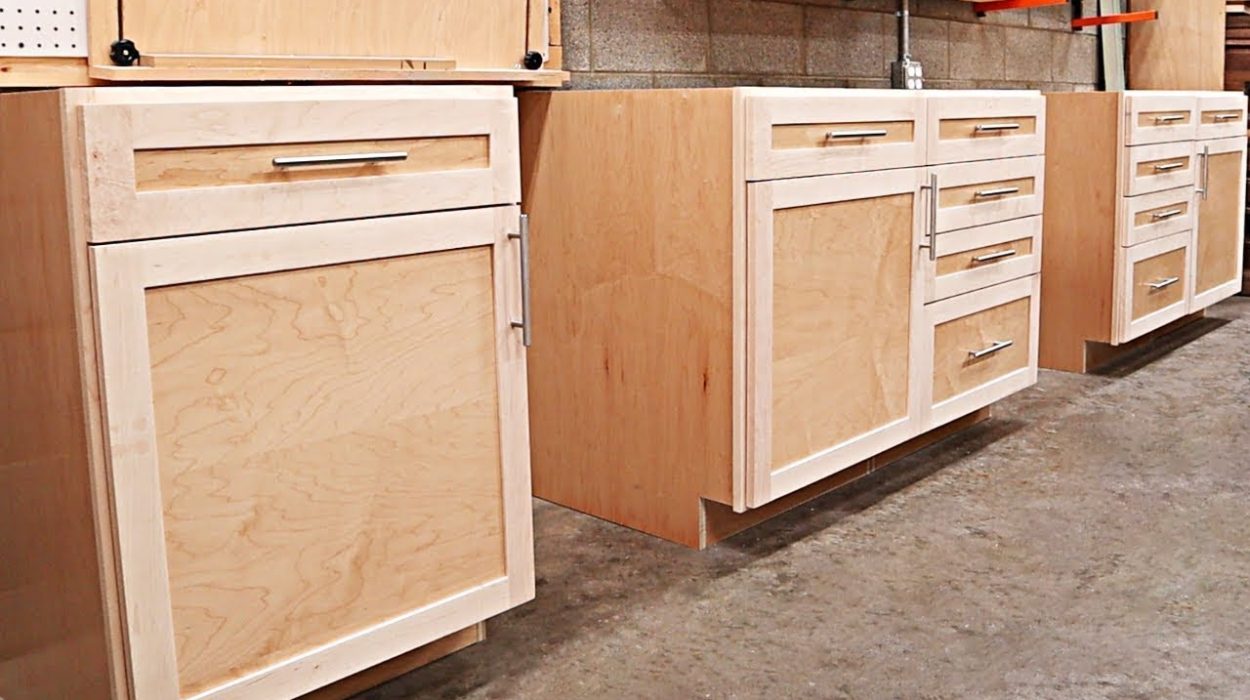
questions that I get from my viewers about making cabinets as well as sharing my favorite tips and tricks for the process and showing you the tools that I find most helpful and least helpful so let’s get started alright so the first question and this is by far the most common question I get go something like this what plywood are you using does that plywood already have finish on it what plywood is that it looks shiny and the answer is yes I build all my cabinets out of pre-finished maple or birch plywood sometimes it’s called UV coated Plywood And I don’t know if that means that the coating protects it from UV light or if they use UV light to cure the coating who knows I searched mine at my local plywood Distributor Nashville plywood company oh that’s real creative so you can make cabinets from pretty much any available sheet goods particle board MDF plywood whatever they go up in price and quality in that order but getting your plywood pre-finished is like the cherry on top of what is already a nice product to work with it’s more expensive as you might imagine it goes for 20 to 25 dollars more per sheet but oh my the trade-off is no sanding and no finishing unless you’re painting it which I’ll talk more about that in a minute basically once you’ve built your cabinet the cabinet is done usually you finish sanding and then finishing your cabinets is going to be a couple days more work and that’s hours and hours of Labor saved when you multiply it out across a whole set of cabinets and you may ask well if I’m going to be painting my cabinets why would I pay extra for pre-finish well you can still Prime and paint this plywood and one benefit to doing that is it’s not going to have any grain raising and you’re not going to have any grain show through on the finished piece it’s going to leave a nice glass smooth finish because the plywood already has a nice glass smooth finish already on it from the start also I try to build all my drawer boxes out of 5 8 inch Baltic birch plywood for low visibility areas like like built-ins laundry rooms and workshops and for high visibility areas like kitchens and pantries I build my drawer boxes out of hard maple I also use hard maple for all my face frames because it’s a very tight grain wood that paints real well and it’s also very dense so it’s going to be durable and stand up to a lot of beading that it’s going to take over time all right so now you know the secret of the shiny plywood it’s time to throw a quick tip your way and this has to do with how I install drawer slides to make sure that they’re all the right height and they match on both sides no matter if you use side mount slides or under mount slides there are a lot of jigs that you can buy they’re going to help you with this installation process but for the most part they work by using a hand or a clamp to hold a jig in place and they rely on you marking reference lines on the side of the cabinet accurately on both sides and hitting that mark I think there’s an easier way and you probably already have what you need to do it since you are building cabinets there’s a pretty good chance that you’ve already got an off cutter scrap laying around that’s tall enough to serve this purpose first trim the plywood to the height of your highest set of slides Now set that inside the cabinet like this and install one slide then just pop it over to the other side and install that one then you can just trim that spacer down to the height of the next set of slides and repeat that process until you reach the bottom using positive references like a plywood scrap guarantees you that the slides are going to be the exact same height no matter what hey and the best part is you use to scrap of plywood that you otherwise would have just squirreled away in your off cut pile because one day you might make something for from it one thing that can make cabinet buildings so much easier is having the right tools on hand and so I want to share with you a tool that I always use in this process well it’s not so much a tool as it is a secret weapon this is a role of two-sided tape and I use this on all kinds of projects in the shop and I don’t always talk about it on camera but trust me it’s there in the background helping me out do you want to stick a spacer jig to the underside of your cabinet two-sided tape and a lot of times those drawer slide spacers want to fall over when I’m trying to install the slides yep two-sided tape and there are so many other circumstances around the shop where I need a temporary but secure hold on something like a second set of hands while I focus on the important task it was so useful when I was making this bit storage tray from my router table I could literally just stick the slides exactly in place and then install each side and guarantee that the slides would go back together after I was done there are a lot of brands of two-sided tape but the one that I’ve found to be the best is from spectate it’s got a really strong hold sometimes so strong that you’ve actually got a prior work apart you to break the bond so another very popular question I get from you guys is how the heck do you know what size to make your cabinets and the snarky answer to that is well you can make them whatever size you need them to be which if you’re doing built-ins or a custom space that you need to fill with cabinets is actually true but if you’re doing something like planning out a kitchen or Pantry then you want to build your cabinets to a specific set of sizes and the good news is there are standards for that sort of thing there are of course books that are going to lay all this out and one of my favorites is this cabinet Maker’s reference but a quick Google search is going to do the trick as well cabinet size standards and why these standards exist is because there are a whole other Industries out there that count on there being a standard so that they can make things like dishwashers and ovens this makes sure that everything goes together properly when you build out your kitchen this by no means an exhaustive list but here are the standards for the most common cabinet types for base cabinets your two most important dimensions are height and depth which are almost always 34 and a half inches and 24 inches respectively 21 inches is another common cabinet depth but that’s generally for bathroom vanities not kitchens oh and a quick disclaimer all of these are American Standards in inches because I’m an American and I don’t know anything else okay for the width you get a little bit more is there a lot of standard sizes between 12 and 42 inches the most common sizes being 24 30 and 36 and you’ll notice that they tend to go in increments of three inches for upper cabinets your Heights have a pretty wide range the most common being 24 30 36 and 42. for depth it’s a little more limited the most common depth is 12 inches and 24 inches for those cabinets that tend to hang over the refrigerator and the widths pretty much follow the same standards as base cabinets and what other standard standard cabinets is measured from the outside edges of the cabinet which if your cabinet has a face frame with overhangs on it is going to be measured from there and not from the cabinet sides so my next tip is one that I learned over a long period of time just saves a lot of headaches and helps your assemblies go by much smoother and that is to measure bit Heights blade Heights and the distance from the fence using relative measurements here’s an example of what I mean so let’s say that I wanted to cut a Groove in the cabinet side to house my back panel and I wanted to make that Groove sit just in front of the nailers then I can just use the nailer itself to set the distance to the fence and not use a ruler or a setup block which may lead to a less than ideal fit Since plywoods are never really the exact same thickness from piece to piece it pays to use the actual part that’s going to go inside the finished cabinet to take this measurement doing it this way you’re always going to get a nice perfect and flush joint with no gaps and the same goes for drawer bottoms as well you can just sneak up on that until you get the perfect fitting joint next I want to share with you one of my favorite tricks for building cabinets and that’s my method a cabinet with a bank of drawers this is what I do to get them on quickly and easily so once I have my drawer fronts made I’m going to go ahead and pre-drill the holes where the pull Hardware is going to go this will be really important soon then I head to the bottom of the cabinet and I like to make a quick jig that I stick on the bottom with 2 two-sided tape like this this can act like a ledge then I can set the front in place and make sure it’s nice and centered I’m going to fasten the front to the drawer using two screws that go through those holes there’s no need for spring clamps or hand-eye coordination and now I’m free to open the cabinet and fasten it from the inside with screws then I just remove those screws from the front and drill my holes all the way through and then I can add my hardware and now that front becomes the ledge that the next one is going to sit on but you do have to account for the small gap between the drawers and to do that I usually like to use a 1 8 inch strip of hard maple that I made special for this process and it works perfectly I lay one down and then add the next front then I use another spacer as a straight edge on the side to ensure that they’re lined up vertically then I could just repeat that whole process over and over again until I’m done so if that’s the first time you’ve ever seen that process you’re probably like me in like mind blown and now every time I install drawer fronts I’ve got to use that method in that tip you saw me use this jig this is the true position cabinet hardware jig and I use this on every single cabinet project that I do that has pulls on it I love this jig because once you have it all set up you can drill all the holes for your cabinet hardware really fast it has these adjustable positive stops that allow you to position the jig in the center of the drawer front and then with these two guides you can set the exact width of your drawer pull I don’t think it could be any simpler it also works on doors and with single knob poles there are a lot of versions of this jig online but a lot of them are plastic I think true position makes the best one in my opinion because it’s aluminum and it’s also made in America if that’s something that’s important to your purchase and the next question you guys typically have for me is related to Cabinet construction and do I always use pocket holes to assemble my cabinets and the answer is for the most part yes pocket holes tend to get a bad wrap and looked upon as a cheap DIY tool however they’ve been a common method for building cabinets and cabinet shops for decades personally I think that cabinets drawers and face frames are exactly where pocket holes are meant to be used and you can add glued to the Joint if you want but personally I don’t think it makes that big of a difference because of the end grain to long grain connection not being very strong to begin with and if you’re using pre-finished plywood like I am I don’t think that glue is going to stick very well to that anyways this entire Bank of cabinets was built with just pocket holes and I’m storing a ton of stuff in there aesthetically you’re not going to see any of the pocket holes in the finished cabinet so the user of the cabinets is not even going to know that they’re there while it’s true that you’re not going to find a shop floor full of Kreg jigs there are a lot of production level pocket hole Cutters like this one from Castle and they even make some that are floor standing models another option you can use is a domino but I really think this is overkill for common cabinets and is going to be an expensive option at that I would go ahead and save this for use in your furniture projects the other joint I like to add to cabinets is a dado along the back and bottom of the sides to capture the back and bottom panels I like doing this because precisely Place dados help ensure that your cabinets are square and that the bottom is at the same height from the front to back which comes in handy when you’re using the bottom of the cabinet as a reference for installing your drawer slides today there are a lot of options that you can go with when it comes to cutting pocket holes and in this video so far I’ve showed you my old Kreg Jig as well as this Castle pocket hole cutting machine and as much as I think this thing has been a game changer when it comes to my production capabilities and efficiency I realize this is probably a little bit more money than the beginner is going to be willing to spin but there are other options like this one that I got from banggood now this is a little bit more stripped down than the Kreg Jig Is but it is made all of aluminum which the Kreg Jig Is plastic and it does come with with the separate little set here that gives you the Mini Jig as well as an assortment of pocket screws these are the same style screws that you would use on the Craig system as well it’s also about half the price of the Craig now I went ahead and tested this one out and I’m satisfied enough with it that I’m going to go ahead and build one of those box platforms like I built for my Kreg Jig and that’s just going to allow me to use this a little bit more effectively on future projects now for being half the price I think this is pretty impressive I really like the fit and finish of the machined aluminum over what the Kreg Jig feels like I also like the fact that this comes in both metric and Imperial standards when it comes to setting the depth of your cut it also has a permanent dust collection Port well I guess it’s not permanent you can unscrew it but it’s a fairly low profile dust collection Port so even when you take this off and take it to your work you can still use dust collection on it which I think that is a really nice feature of this jig as well and the last favorite question is all about the mystery of drawer spacing how do you figure that out are there rules how do you know how big to make your cabinets and I know all that can seem daunting at first and there is some math involved but there’s a methodology that you can follow to get it right and once you do it a time or two you can almost do it your head after that to get started the first thing you need to do is decide how many drawers you want in your cabinet for this example let’s use four next measure the inside opening of your cabinet and this one has a 29 inch opening A good rule of thumb for spacing your drawers is to have a one inch Gap at the top of each drawer and a half inch Gap at the very bottom so if your camera is going to have four drawers you’re going to need four one inch gaps and one half inch Gap now add up all those gaps and subtract it from your opening that’s going to leave us with 24 and a half inches of drawer space okay now it’s time to make another decision if you’re going to make all your drawers equal in size then just take that number and divide it by four and that means your door boxes are all going to be 6 and 1 8 inch high then to figure out the different heights for your drawer slides just measure up from the bottom of the opening to the bottom of each drawer and I always mount my drawer slides right at the very bottom of the drawer to make this calculation easy if you want shelves in your cabinets instead of drawers then you’re probably going to want shelf pin holes to make those shelves adjustable and to do that process I use two very different Tools in different situations the first one is this shelf pin jig from Craig and I’ve had this one for I don’t know how many years a really long time I like this jig because it has metal bushings in all of the guide holes which I think is much better than a lot of the other jigs which are just all plastic or even wooden and it also comes with its own drill bit with stop collar and this indexing pin using it is pretty simple the base has a reference that you can butt up against your cabinet side and you can drill your first hole and then use that indexing pin to start your next set of holes I find that this jig is most helpful on cabinets that are already assembled because it’s nice and portable and allows you to get inside the cabinet easily but for all my new cabinet builds I begun using the lr32 system from Festool this system utilizes a router with an indexing plate that moves along this rail and locks into place at set intervals of 32 millimeters which is an industry standard Dimension this method can create 8 runs of shelf pin holes faster than with the Kreg version and using a router bit instead of a drill makes a much cleaner hole so for me I’m always going to have this jig on hand because it’s so handy and portable for existing Cabinetry and it’s also just a good budget friendly option for a doing shelf pin holes but for all of my new cabinets I’ve already switched over to the lr32 system for me it’s just so much faster and more all right well that’s it questions answered plus tips and tools to help you improve your cabinet …
“+10,000 Step By Step Plans …even if you don’t have a large workshop or expensive tools!“ Yes, Get Access To 12,000 Shed Plans! 👈